So excited to be sharing this!
We will be setting up our fresh new wordpress website. Before we do anything fancy with the website we shall be updating the core wordpress settings.
Once we have done this out will be at Ground Zero. It is a brand new blog and now we can build on this.
So shall we start?
Change WordPress Reading, Writing settings
We will go to the readings and writing section in the dashboard. We need to set the blog post structure, check all the settings here. Please check the blog post to watch me do this.
In the plugins section later I will show you another way to set the URL structure. This is much easier and properly done.
l
Go to the Blog dashboard.
For this you need to go to http://yourblogname.com/wp-admin and login
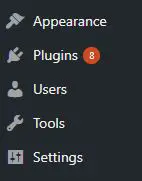
On the left hand sidebar you will notice something which says “ Settings ”
Click on that.
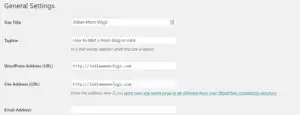
General Settings
- Site Title: Add your Website Title
- Site Tagline: Add a tagline – include your keyword here.
- Email Address: Update this email address if you want to.
Scroll down to update
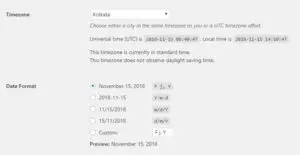
- Timezone : Change timezone to your country
- Date Format: You can change this to the format you like
I do not update any of this.
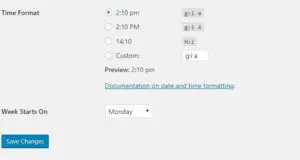
Scroll down to update Time Format and when you want the week to start.
[click_to_tweet tweet=”Reset you Blog to Ground Zero. A clean slate always helps. #startablogindia @indianmomvlogs” quote=”Reset you Blog to Ground Zero. A clean slate always helps. ” theme=”style2″]
I do not update this section.
Writing Settings
This section is for what happens once you publish a post on your blog.
- Default Post Category – Select a category from your list of categories. This is the category which wordpress will select for you by default. You can always override this on your blog post.
- Default Post Format – We will not be updating this. Leave it as Standard.
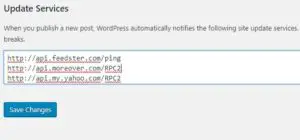
The Update Services section can be updated with ping servers. You can leave this as a default or download a list of ping services I update this with.
[mailmunch-form id=”760444″][mailmunch-form id=”760444″] [click_to_tweet tweet=”Get your Blog Noticed! Download Ping List for FREE https://page.co/9koa #startablogindia #bloggingtips @indianmomvlogs” quote=”Get your Blog Noticed! Download Ping List for FREE !” theme=”style3″]Copy and paste those URLs in this section and hit “ Save Changes”.
What this does it, it will update the servers that you have fresh content on your blog. The ping services will be notified of blog updates. The servers will then come and check your post. This means your post will be indexed faster. This is a great way to get some search engine juice.
Reading Settings
When a blog page is loaded into the browser, these are the setting which can change the display.
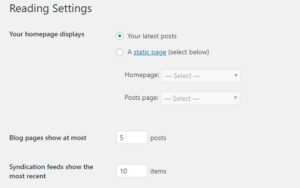
- Your homepage displays : You can show either the latest posts or show a static page on your website.
Once your website grows you can create a page on the Blog and call it say “Start Here”.
This will be the point of entry into your Blog. On this page you could provide a brief introduction of your blog and point to the various blog posts. This is very helpful for your readers and you can think of it as a guide or a map.
- Your homepage displays : You can show either the latest posts or show a static page on your website.
- Blog posts show at most – how many posts you want shown. I leave it at default setting.
- Syndication feeds show the most recent – I leave this at default setting
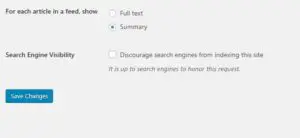
- For each article in a feed, show – Select Full text if you want the entire text to be shown. I select Summary, it shows around 50 words snippet and this is helpful in loading a webpage faster.
- Search Engine Visibility – Ensure that this in unchecked. If you check this, search engines will not come and visit your website.
Discussion Settings
In this section we set the comment settings, whether we would like to be notified about pingbacks.
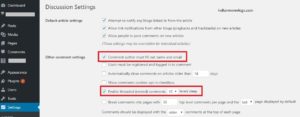
I check all boxes
- Attempt to notify any blogs linked to from the article – If you link within your article to another website and that website allows pingbacks, then that site will get a notification in their comment section
- Allow link notifications from other blogs (pingbacks and trackbacks) on new articles – When others link out to your article you will receive notifications
- Allow people to post comments on new articles – Allow comments on posts
- Comment author must fill out name and email – I make sure this is checked so that users fill in their details
- Enable threaded (nested) comments 10 levels deep – I set this to 10 levels deep and make sure it is checked
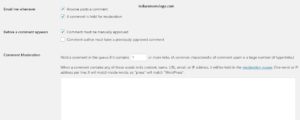
- Before a comment appears – Comment must be manually approved – I make sure this is checked as I manually approve every comment. This helps me keep spam in check also , reminds me to reply to comments
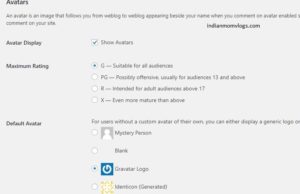
When people post a comment on your website they can select an avatar. I set this to gravatar.
Media
In this section we can set the desired image sizes. Personally I don’t mess with these settings.
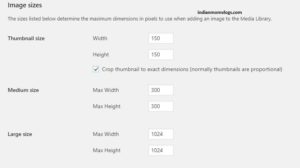
Permalinks
This section is very important for SEO or Search engine optimization
By default the first option will be selected ( Plain – https://indianmomvlogs.com/?p=123 ) .
This is not SEO friendly. We want p=123 replaced by our keywords
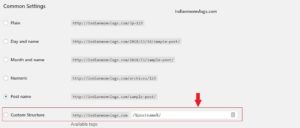
Example: mybabyshopsite.com/red-baby-shoes is better for SEO than mybabyshopsite.com/?p=123
Edit this section and select the option
Custom Structure – http://yourwebsite.com/%postname%/
Privacy
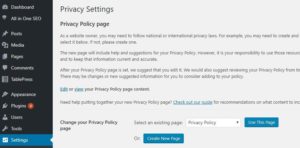
Privacy page is a must for a compliant website. If you want to place adsense, you need to privacy policy page. Create a new Policy page and select it and save it.
This post first appeared on indianmomvlogs.com
- 1 Change WordPress Reading, Writing settings
- 1.1 General Settings
- 1.2 [click_to_tweet tweet=”Reset you Blog to Ground Zero. A clean slate always helps. #startablogindia @indianmomvlogs” quote=”Reset you Blog to Ground Zero. A clean slate always helps. ” theme=”style2″]
- 1.3 Writing Settings
- 1.4 Reading Settings
- 1.5 Discussion Settings
- 1.6 Media
- 1.7 Permalinks
- 1.8 Privacy


Thnx for sharing.